How Much Backlight Bleed Is Normal? Test It and Decide If You Should Return Your Monitor
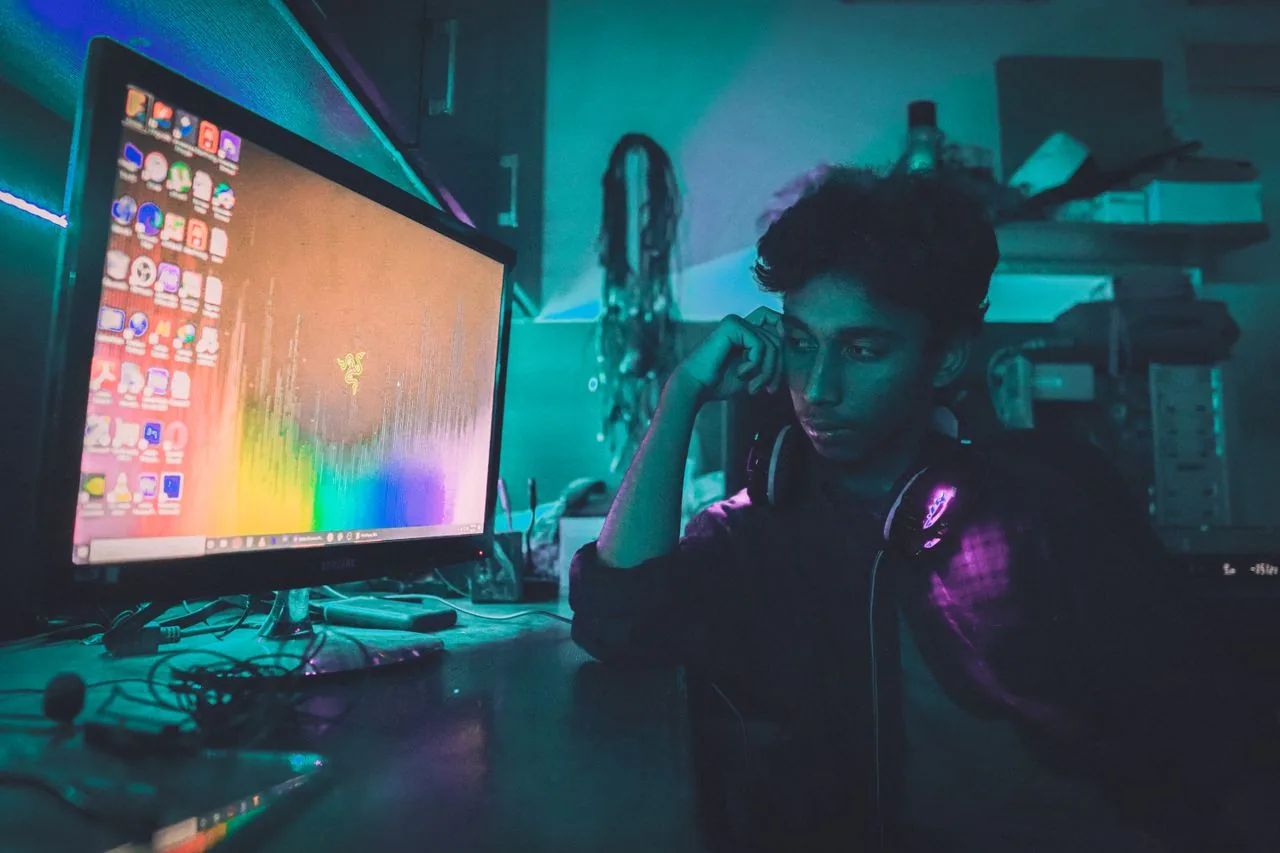
You unbox a new monitor, fire up a dark game or a black desktop, and there it is: a pale glow seeping in from a corner. Now the worried-buyer spiral starts. Is this a defect? Is it normal? Is it bleed, or that “IPS glow” people mention? And the question with money attached — should you return it while you still can? Search the forums and you get a hundred photos and a hundred opinions, but no clean answer.
This guide gives you the clean answer. You will learn how much backlight bleed is normal, how to tell backlight bleed apart from IPS glow and clouding, how to run a proper test with a free full-screen black test, and a concrete decision tree for whether to RMA. No fake percentages, no scare photos — just a reproducible workflow that ends with a confident keep-or-return call.
The fast answer: Some bleed is normal on nearly every LCD. It is acceptable when it is a faint corner or edge glow you only catch on a pure black screen in a dark room, and that vanishes during normal use. It is return-worthy when a bright, distinct cloud reaches well inward from the edge, shows in everyday daytime use, or distracts you in dark scenes — and you are still inside the return window. Judge it by what your eyes see in normal use, not by a long-exposure phone photo, which always makes it look worse. Run the backlight bleed test at your real brightness first.
First: Is Some Backlight Bleed Normal?
Yes. Almost every LCD — whether IPS, VA, or a budget TN panel — shows at least a little backlight bleed when you look at a full black image in a dark room. The backlight behind the panel is always on, and the liquid-crystal layer cannot block 100% of it at the edges where the frame holds everything together. A small amount of leaked light is a side effect of how the technology works, not a sign your unit is broken.
So the real question is never “does my monitor have bleed?” — it almost certainly does — but how much, where, and whether it matters during real use. There is no official industry threshold and no honest percentage figure; manufacturers grade uniformity loosely and treat mild bleed as within spec. Independent labs like RTINGS measure black uniformity precisely, but even they describe results in relative terms because what one person never notices, another finds distracting.
That is why this guide leans on a reproducible test plus a decision framework instead of a made-up number. The same diagnose-then-decide approach helps with other panel worries too, like checking for dead and stuck pixels before you panic, or working out why your blacks look gray from an RGB range mismatch rather than a panel fault.
Backlight Bleed vs IPS Glow vs Clouding
Most return regret comes from confusing three different things. People RMA a perfectly normal monitor for “bleed” that was really IPS glow, get an identical replacement, and conclude every unit is defective. Learn to tell them apart and you have already won half the battle.
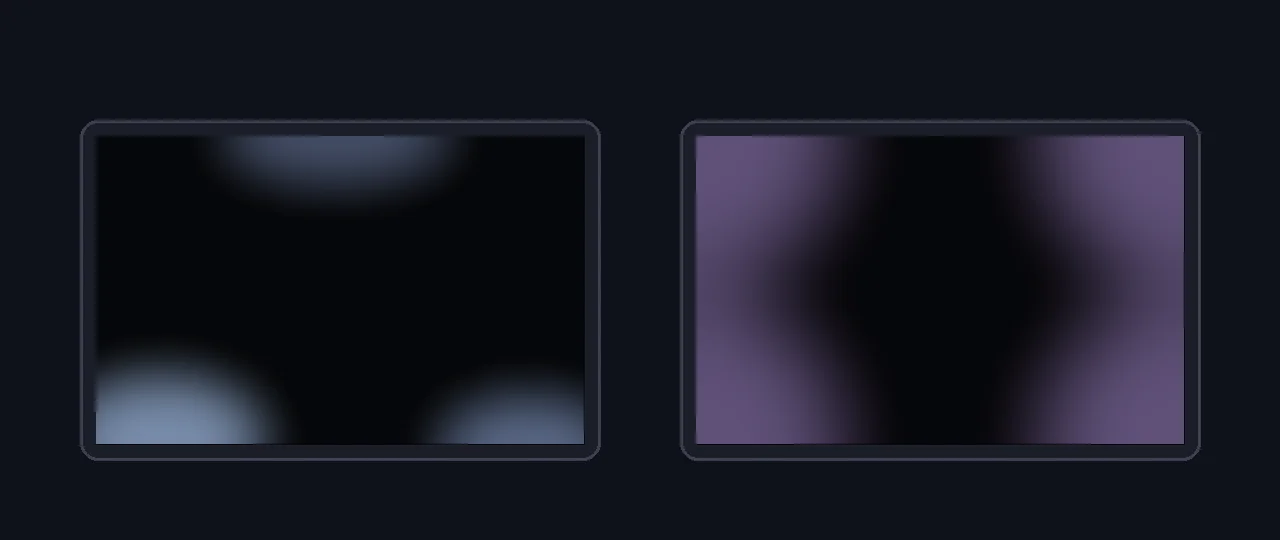
Backlight bleed is a fixed leak. It appears as bright patches or streaks at specific edges and corners, it stays in the same place no matter how you move your head, and it is caused by uneven pressure or imperfect assembly in the LCD stack. It can be a manufacturing defect when severe.
IPS glow is a normal optical trait of IPS panels. It is a silvery, golden, or purple haze around the corners that changes as you move, lean in, or shift off-center, and largely fades when you sit straight on at a normal distance. Per display experts, IPS glow happens when light passes through the crystals at an angle — so it is inherent to the panel, not a fault, and a replacement will show it too.
Clouding (sometimes called “flashlighting”) is uneven, mottled patches of lighter gray across a black screen, more common on VA panels. Mild clouding is normal; heavy, blotchy clouding that you see in dark content is a uniformity problem.
| Trait | Backlight bleed | IPS glow | Clouding |
|---|---|---|---|
| What it looks like | Bright patch or streak leaking from an edge/corner | Silvery/purple haze in the corners | Mottled lighter-gray blotches across the panel |
| Where it shows | Fixed at specific edges/corners | Corners, spreading toward center at an angle | Scattered patches anywhere |
| Changes with head movement? | No — stays put | Yes — shifts and fades with angle | No — stays put |
| Defect or normal? | Can be a defect if severe | Normal IPS trait | Mild is normal; heavy is a fault |
| Fixable / returnable? | Sometimes eases; RMA if bad | Inherent — no fix, do not RMA | RMA only if heavy |
The one-second test: on a full black screen, move your head left, right, up, and down. If the glow shifts, grows, or fades with the angle, it is IPS glow — normal, do not return. If the bright patch stays locked in the same spot, it is backlight bleed — now judge how much.
Run the Test Correctly (Most People Get This Wrong)
The test itself is simple, but the conditions decide whether your result is honest or alarmist. Use the backlight bleed test, which fills the screen with pure black and lets you adjust brightness and step through several dark shades, then follow these conditions exactly.

- Set your real brightness. Use the brightness you actually run day to day, often around 30–50%. Cranking to 100% exaggerates every flaw and is not how you use the monitor.
- Dim the room, do not black it out. A normal evening room is right. Total darkness makes both bleed and glow look dramatically worse than real use, which is exactly how people scare themselves into a needless return.
- Sit at your normal distance, straight on. Pressing your face to the corner of an IPS panel guarantees you will see glow that you would never notice from your chair.
- Go full screen and let your eyes adjust for 20–30 seconds before judging.
- Move your head to separate fixed bleed from angle-dependent IPS glow, as above.
- Step through a few dark shades. Pure black is the harshest test; very dark gray is closer to real dark-scene content. The tool lets you compare both.
Seeing it demonstrated helps. This short video walks through testing a laptop or monitor for backlight bleed, IPS glow, and dead pixels with full-screen black and solid-color screens — a good calibration for what to look for before you judge your own panel.
How Much Is “Too Much”? A Decision Tree
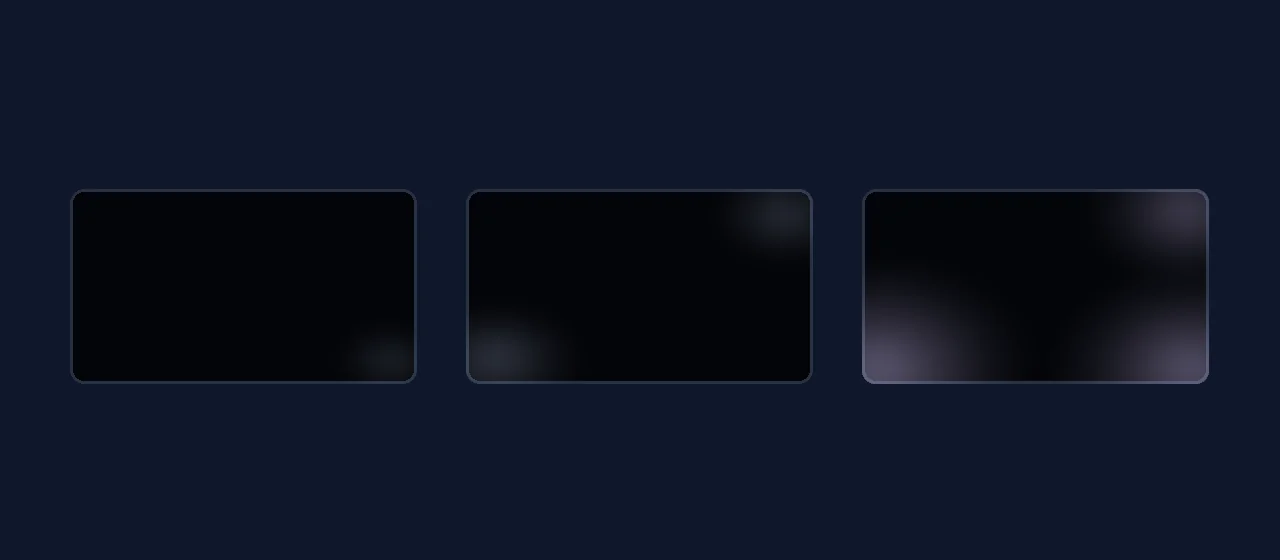
Now the verdict. Forget percentages — you cannot reliably measure them at home and no maker publishes a pass/fail line. Judge instead by size, position, and real-use visibility. The illustration below shows the spectrum, from a harmless pinpoint to a clearly returnable cloud.
Walk the decision tree:
- Does it move when you move your head? Yes → it is IPS glow, keep it. No → continue.
- Can you see it during normal daytime use with real content? No, only on pure black in a dark room → acceptable, keep it. Yes → continue.
- Is it a small corner pinpoint, or a large cloud spreading inward? Small pinpoint → acceptable for most people. Large bright cloud reaching well into the screen → continue.
- Does it distract you in dark movies, games, or letterbox bars? No → borderline, your call. Yes → return-worthy.
- Are you still inside the return or warranty window? Yes → an RMA is reasonable. No → try the safe fixes below.
The honest middle ground: a faint glow in one or two corners that you only see on a black screen in a dark room is normal and not worth returning. A bright, obvious cloud that reaches deep into the panel and shows up while you actually watch or game is a legitimate reason to RMA if you can still do so. Everything in between is a judgment call based on how much it personally bothers you.
Capture Honest RMA Evidence (and the Panel-Lottery Reality)
If you decide to return, you will likely need a photo. The trap is that phone cameras brighten dark scenes automatically, turning a faint glow into a glaring cloud — which sellers know, so wildly over-exposed shots can get rejected as misleading. Capture it honestly instead.
- Match real brightness and a normal dim room, not pitch black at 100%.
- Lock exposure low. On most phones, tap the dark screen to focus, then drag the exposure slider down until the photo roughly matches what your eyes see.
- Shoot from your normal viewing distance, straight on, with a steady hand or tripod. A nose-to-glass macro is not representative.
- Keep one reference shot at honest settings and, if asked, a short video panning your head so the seller can see the bleed stays fixed (i.e. it is genuine bleed, not glow).
Monitors are a panel lottery. A replacement can have more bleed, different bleed, or a fresh dead pixel. Only RMA when the current unit genuinely bothers you in real use — not because a scary photo made a normal panel look broken.
Before you commit, it is worth running the rest of a quick panel check so you are not trading one issue for another. A screen uniformity test reveals brightness and color evenness, a black level test shows how deep your blacks really go, and a dead pixel test catches point defects. Knowing the whole panel’s condition makes the keep-or-return call far easier.
Can You Fix Backlight Bleed? Safe vs Unsafe
Sometimes, partly. Here is what is safe to try, and what to never do.
Safe to try
- Lower your brightness. Bleed scales with backlight intensity, so a more comfortable brightness often makes mild bleed effectively disappear.
- Give it time. Some panels settle over the first days or weeks of use, and minor bleed eases as materials relax. Re-test after a week before deciding.
- Loosen over-tight screws. If you mounted the monitor on a VESA arm or tightened the stand hard, back the screws off slightly. Excess clamping pressure on the frame is a real cause of corner bleed.
- Relieve frame pressure. Make sure nothing — a tight bezel, a warped stand, a cable pushing the back — is squeezing the panel unevenly.
Do not do this
- Do not rub or press the bleeding area. The popular “massage the corner with a microfiber cloth or your thumb” trick risks permanent damage: you can create dead pixels, leave pressure marks, crack the backlight diffuser, or void your warranty. The small chance of improvement is not worth bricking the panel.
- Do not open the monitor to re-seat the panel unless you genuinely know what you are doing and accept the warranty loss.
Your keep-or-return checklist:
- Move your head first — rule out normal IPS glow before anything else.
- Test at your real brightness in a normally dim room, straight on, with the backlight bleed test.
- Place it on the spectrum: pinpoint corner = keep; large inward cloud visible in normal use = consider RMA.
- Capture honest, exposure-locked evidence if you return — never an over-bright photo.
- Try safe fixes (lower brightness, settle time, loosen screws). Never press or rub the panel.
- Remember the panel lottery: only RMA inside the window when it truly bothers you in real use.
FAQ: Backlight Bleed, IPS Glow, and Returns
How much backlight bleed is normal?
Some backlight bleed is normal on almost every LCD, especially IPS and VA panels. As a practical rule, bleed is acceptable when it is a faint corner or edge glow that you can only notice on a full black screen in a dark room at high brightness, and that disappears during normal use with real content. It is a problem worth returning when a bright, distinct cloud or patch reaches well inward from the edge, stays visible in everyday daytime use, or distracts you in dark movie or game scenes. There is no official percentage, so judge it by visibility during normal use rather than by a phone photo, which always exaggerates it.
What is the difference between backlight bleed and IPS glow?
Backlight bleed is a fixed leak of light, usually from the edges or corners, that stays in the same spot no matter how you move your head. It is an LCD assembly or pressure issue and can be a defect. IPS glow is a silvery or purple haze in the corners that changes as you move, lean, or shift off-center, and fades when you sit straight on. IPS glow is a normal characteristic of IPS panels, not a defect. The quickest test is to move your head: if the light shifts or fades with viewing angle it is IPS glow; if it stays put it is backlight bleed.
Should I return or RMA my monitor for backlight bleed?
RMA is reasonable when the bleed is clearly visible during normal daytime use, forms a large bright cloud that extends inward from a corner or edge, or genuinely distracts you in dark content, and you are still inside the return or warranty window. It is usually not worth it for a faint corner glow only visible on a pure black screen in a dark room, because monitors are a panel lottery and a replacement can easily be the same or worse. Test first, capture honest evidence, and weigh how much the bleed actually bothers you in real use before starting a return.
How do I test my monitor for backlight bleed?
Open a free full-screen black test, set your monitor to the brightness you actually use day to day, and dim the room to a normal evening level rather than total darkness. View the screen straight on from your usual seating distance and look for bright patches at the edges and corners. Then move your head to separate fixed bleed from angle-dependent IPS glow. Avoid judging by a long-exposure phone photo, which makes any panel look far worse than your eyes see.
Can backlight bleed be fixed at home?
Sometimes minor bleed eases on its own as the panel settles over the first days or weeks. Safe steps include lowering brightness, loosening any over-tightened VESA or stand screws that press on the panel, and making sure the monitor is not being squeezed by its frame or a tight mount. Avoid the popular advice to firmly rub or press the bleeding area with a cloth or your thumb; pressure mods can permanently damage the panel, create dead pixels, or void your warranty. If safe adjustments do not help and the bleed bothers you, an RMA inside the window is the better fix.
Why does my backlight bleed look worse in photos?
Phone cameras brighten dark scenes with long exposures and aggressive processing, so a faint glow your eyes barely notice becomes a glaring bright cloud in the photo. For an honest record, lock the exposure low, match a normal room brightness, and shoot from your real viewing distance. The most reliable judgment is still what you can see with your own eyes during normal use, not the worst-case photo.
Sources and Further Reading
- RTINGS — Black Uniformity: how labs measure bleed, glow, and clouding on a black screen
- RTINGS — Gray Uniformity test methodology
- DisplayNinja — Backlight Bleed Test and how-much-is-normal guidance
- Tom’s Hardware forum — “Is this bleed acceptable?” real-world buyer discussion
Related Display Test Tools
Worried bleed is hurting dark content? It pairs naturally with checking for PWM flicker and eye strain and confirming whether washed-out blacks are a signal-range issue rather than the panel. Run the focused test, follow the decision tree, and you will make a keep-or-return call you can actually trust.
Ready to judge yours? Open the Backlight Bleed Test, set your real brightness, move your head to rule out IPS glow, and place your result on the spectrum above.