












Fast Answer
You cannot make a mathematically smooth circle from square blocks, but you can make a clean, symmetric pixel circle. Mark the center, place the four axis points, build one quarter of the outline, then mirror that pattern three times. For an exact layout, enter a radius in the Minecraft circle generator, copy the highlighted blocks, and use its block count before you collect materials.
Minecraft gives you cubes, so every curve is really a staircase viewed from far enough away. The skill is not hiding those steps; it is keeping them consistent. A run that changes from five blocks to three, then two, then one can look round when the same sequence is mirrored around all four sides. One missed block makes the whole build lean.
This guide teaches both routes. The manual method helps you understand center points, axes, and symmetry. The browser shortcut produces the exact grid for radii from 1 to 256, counts the selected blocks, and saves a PNG you can keep beside the game. The geometry is the same in Java and Bedrock because you are placing ordinary blocks, not running commands or installing a mod.
The 10-second shortcut: generate the exact block grid
Open the Minecraft circle generator and enter the radius of your build. Radius means the distance from the center block to the outside edge. The tool always makes an odd-width grid: radius 5 becomes an 11×11 circle because the diameter is 2R+1. That single center block is what makes every side mirror cleanly.
The shared controls are currently labeled in English on every locale page. Choose Outline (1 block thick) for a wall edge, Filled disc for a floor, Thick ring (2 blocks) for a broader wall, or Sphere layer (3D) for one horizontal slice of a solid sphere. The tool does not make ovals, even-diameter circles, schematics, or a rotatable 3D model.
- Set Radius. If the finished footprint must be 31 blocks wide, use radius 15. The grid and diameter update immediately.
- Choose a mode. Use Outline for the common tower or arena perimeter. Change modes only if the build really needs a floor, thicker ring, or sphere slice.
- Read Block count. It counts the green squares for the current grid. Treat numbers in this article as counts for this exact algorithm; another chart may round the curve differently.
- Click Download PNG. Keep the blueprint on a second monitor or phone and copy it row by row. PNG is the only export; there is no schematic or WorldEdit file.
How to build a Minecraft circle manually with one mirrored quarter
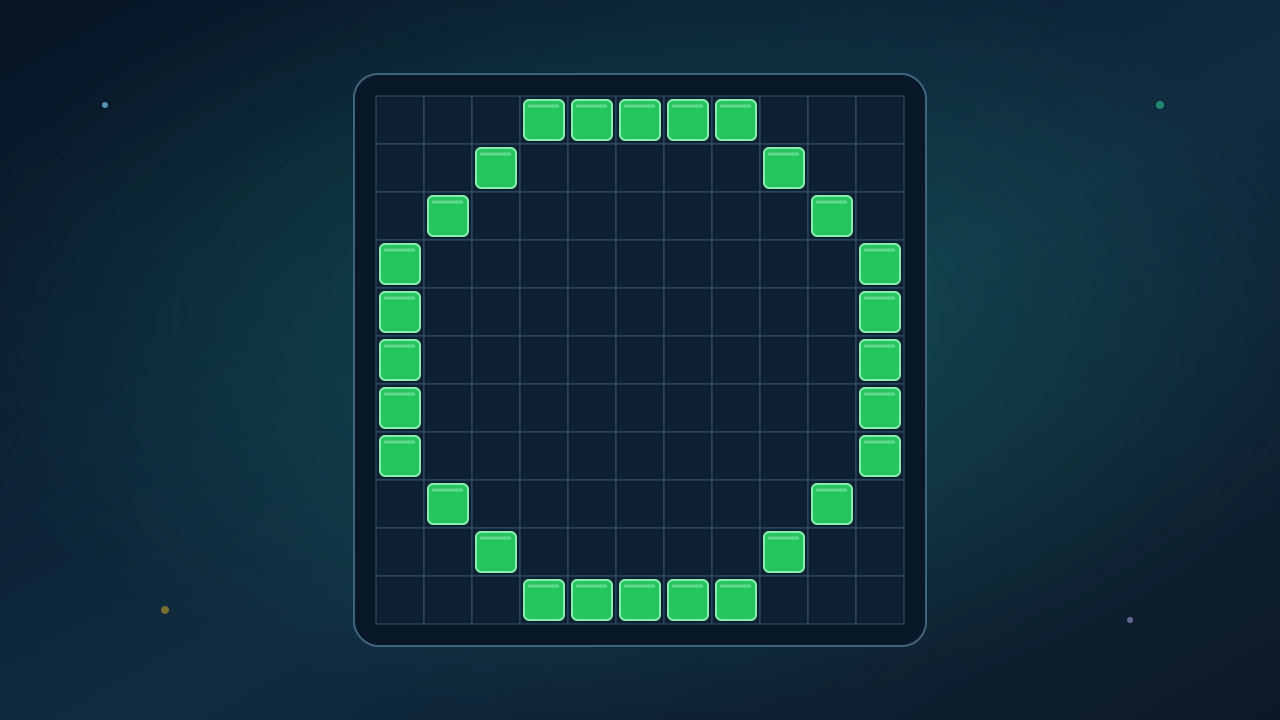
A circle has the same shape above, below, left, and right of its center. That symmetry is your error-checking system. Instead of improvising 360 degrees of curve, solve one quarter and repeat it. This is faster, easier to count, and much less likely to produce a lopsided tower.
- 1. Choose the footprint. Pick an odd diameter if you want one center block. Use the table below for a common size or calculate
radius = (diameter−1)/2. - 2. Mark the center. Use a temporary block that contrasts with the floor. Do not remove it until all four sides have been checked.
- 3. Mark north, south, east, and west. Count the radius from the center in all four directions and place an edge block at each endpoint. These are the four anchors of the ring.
- 4. Build one quarter. Follow the grid from the north anchor to the east anchor, copying each straight run and diagonal step exactly. Count the blocks in every run instead of judging the curve by eye.
- 5. Mirror the quarter. Repeat the same run sequence from east to south, south to west, and west back to north. Each matching block should have a partner across both center axes.
- 6. Audit before adding height. Stand above the footprint, check the four anchors, and compare opposite runs. Fix the foundation now; a one-block mistake becomes an entire vertical scar when you stack a tower.
Minecraft circle chart: verified small and medium outline sizes
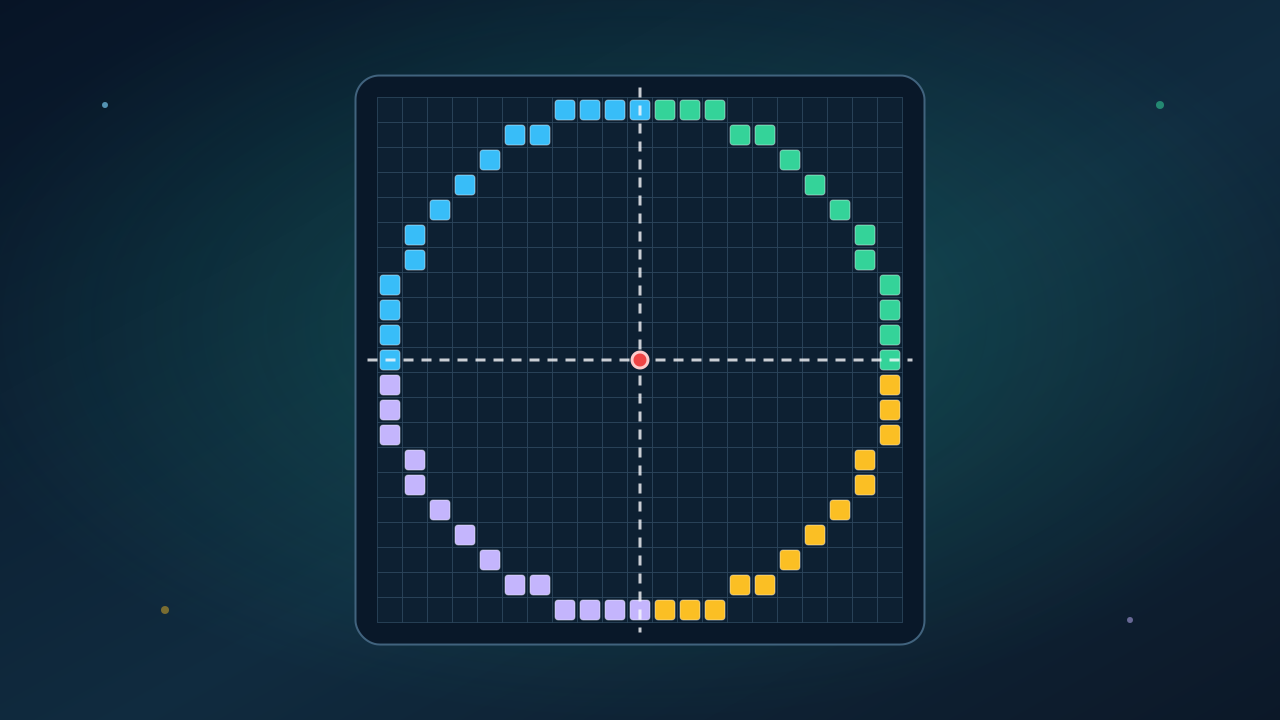
These counts were produced by the current KeyboardTester.click outline algorithm on July 16, 2026, then checked directly against its grid. They are not universal laws: pixel-circle tools can make different rounding choices near a diagonal. If you start with this chart, keep using the same chart for every layer of the build.
Small rings are visibly blocky, which is not automatically a problem. A 7×7 well or turret can look intentional when the surrounding build uses the same proportions. Preview several radii before mining materials; “best” size depends on viewing distance, wall thickness, and how much interior space you need.
Outline counts from the live radius-based tool
| Radius | Grid / diameter | Outline blocks | Practical starting point |
|---|---|---|---|
| 2 | 5×5 | 12 | Tiny badge or decorative detail |
| 3 | 7×7 | 16 | Small well, pillar, or turret |
| 4 | 9×9 | 24 | Compact tower or fountain |
| 5 | 11×11 | 28 | Small round room or tower |
| 6 | 13×13 | 32 | Roomier tower or dome base |
| 7 | 15×15 | 40 | Medium tower, gazebo, or pond |
| 10 | 21×21 | 56 | Arena, base, or large dome |
| 15 | 31×31 | 84 | Large tower or arena footprint |
Odd vs even diameters: where is the center of the circle?
The generator in this guide accepts a radius, so its width is always 2R+1: 5, 7, 9, 11, 13, and so on. An odd circle has one physical center block. That makes the four axes obvious and is the easiest layout to mirror.
Minecraft can still have an even-width circle. Its center sits at the crossing between four blocks instead of on one block. For a practical conversion, generate the next odd size down, duplicate its middle row and middle column, then treat the resulting 2×2 center as the new mirror point. Check the four joins before building upward. The tool itself cannot render even diameters, so this adjustment is manual.
- Choose odd when a single center point helps: towers with a central stair, domes, fountains, or symmetrical floors.
- Choose even when the entrance, corridor, or centerpiece must be two blocks wide. Plan the 2×2 center before placing the ring.
- Never mix both systems. Starting from one center block and then widening one side to make an even footprint is the usual cause of a circle that looks shifted.
Turn the circle into a tower, cylinder, dome, or sphere
A cylinder is the easy upgrade: stack the exact same outline on every Y-level. For a walkable wall, the tool’s thick-ring mode combines the outer outline with the next smaller outline. Check doors and stairwells against the interior diameter before you repeat the ring upward.
A sphere is not one circle copied vertically. Each level is a different horizontal disc. In Sphere layer (3D), set Layer offset to 0 for the equator, then step upward from 1 to the radius. The page shows one filled slice at a time. Build those layers above the equator, then mirror the same sequence below it. It is not a 3D preview and it does not generate a hollow shell.
The displayed “Sphere total” is useful for rough planning, but do not treat it as an exact shopping list. The current all-layer total and the rendered pole slices can differ slightly at larger radii, so follow the visible slices and carry spare blocks. For a hollow dome or shell, use only the outside edge of each slice rather than filling its interior; that hollow conversion is manual.
Choose the mode that matches the build
| Tool mode | What it draws | Good use | Important limit |
|---|---|---|---|
| Outline | One-block curve | Tower edge, arena border, well | Not guaranteed edge-connected at every diagonal |
| Filled disc | Every block inside the radius | Floor, platform, pond base | Solid, not hollow |
| Thick ring | Outer outline plus the next inner outline | Broader wall or path edge | Fixed two-outline treatment |
| Sphere layer | One filled horizontal slice | Solid sphere or dome planning | No 3D view or hollow-shell mode |

Six mistakes that turn a circle into a lopsided oval
Most failed circles are counting errors, not geometry problems. Stop after the foundation and compare the four sides before using expensive blocks or adding height.
- Confusing radius with diameter. A radius-15 input makes a 31-block grid, not a 15-block grid.
- Losing the center marker. Keep the center and four axis endpoints visible until the outline closes.
- Eyeballing every quarter. Finish one quarter and copy the same run lengths; four independently improvised curves rarely match.
- Rotating a run incorrectly. When you turn the corner, the same horizontal run becomes vertical. The length stays the same.
- Changing algorithm halfway through. Do not mix blocks from two different online charts just because both say “21×21.” Their rounding may differ.
- Ignoring the inside diameter. A thick wall consumes floor space. Check the usable interior before stacking a tower or fitting a spiral stair.
Does the method work in Java and Bedrock Edition?
Yes. A block-by-block circle is just a placement pattern, so the same outline works in Java Edition, Bedrock Edition, Pocket Edition, and console Bedrock. The guide does not depend on commands, debug overlays, mods, or version-specific blocks.
What changes is your building workflow, not the geometry. Creative flight makes a top-down audit easier; in Survival, temporary scaffolding and a contrasting cheap block help preserve the center and axes. The browser tool only supplies a grid and PNG. It does not connect to your world or place blocks for you.
Useful tools for the rest of the build
Once the footprint is right, these browser tools can help with the rest of a gaming project without changing the circle pattern.
Generate the outline, filled disc, thick ring, or one sphere slice; verify the block count and save a PNG.
Design a custom crosshairCreate a clean crosshair for supported games and preview its shape before copying settings.
Name a server group or guildGenerate themed group names when the build belongs to a clan, realm, or community.
Create a matching gamertagExplore readable gaming names without recycling the same common tag patterns.
Related Minecraft and clicking guides
Measure rapid click events and understand why a browser result never overrides a Minecraft server’s rules.
Jitter click vs butterfly clickCompare speed, control, fatigue, and anti-cheat risk for Minecraft PvP.
Measure clicks per secondRun a basic CPS test and learn what the number does—and does not—say about play.
Watch the patterns built from 1 to 25 blocks wide
Xbox Architect’s tutorial shows how small Minecraft circles change as the diameter grows. Use it to see the run-length rhythm, then use the grid above for the exact radius you need.
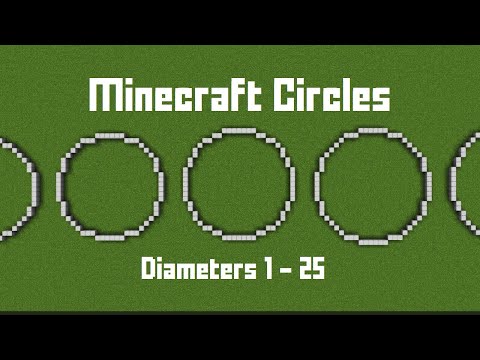
A block-by-block video reference for Minecraft circles from 1 to 25 blocks in diameter, supporting the article’s manual pattern method.
Sources and verification notes
The block counts come from the current KeyboardTester.click algorithm and rendered grids. The external references below support the general circle, radius, symmetry, and layered-sphere concepts.
- KeyboardTester.click: Minecraft Circle Generator
Primary source for the exact radius limits, modes, grid behavior, PNG export, and every block count used in this guide.
- Minecraft: How to Structure Your Build
Official Minecraft guidance showing circles as planned outlines and spheres as a sequence of circles of changing size.
- Microsoft MakeCode: circle
Official MakeCode reference defining a circle by center, radius, orientation, and block operation.
- Xbox Architect: Creating Circles up to 25 Blocks in Diameter
The embedded visual tutorial used to verify that the selected video directly demonstrates block-circle patterns.
Frequently Asked Questions
- How many blocks does a 31-block Minecraft circle need?
In the current KeyboardTester.click outline pattern, a radius of 15 produces a 31×31 grid and uses 84 outline blocks. That count belongs to this exact rounding algorithm; another chart may choose a slightly different curve. A filled disc at the same radius uses far more blocks, so make sure the tool is still on Outline mode.
- Can you make a perfect circle in Minecraft?
Not as a mathematically smooth curve, because Minecraft is built from square block faces. You can make a symmetric pixel approximation whose repeated steps look round at normal viewing distance. Larger circles usually make each step less visually dominant, but the best size still depends on the build.
- How do I make an even-diameter circle?
Generate the next odd size down, duplicate its middle row and middle column, and use the resulting 2×2 center as the mirror point. Check all four joins because this is a manual conversion. The radius-based tool itself always outputs odd diameters of 2R+1 and cannot render an even circle directly.
- Does the same circle pattern work in Java and Bedrock?
Yes. The pattern only tells you where ordinary blocks go, so the geometry is the same in Java and Bedrock. This guide does not rely on Java debug keys, commands, mods, or a version-specific block.
- How do I make a sphere from Minecraft circles?
Build a sequence of filled horizontal slices. In Sphere layer mode, start at offset 0 for the equator, increase the offset one layer at a time until the pole, and mirror the same sequence below the equator. The tool displays one slice at a time, not a 3D model or hollow shell.
- Can the circle generator export a schematic or WorldEdit file?
No. It exports a PNG image only. It does not create schematics, WorldEdit commands, block palettes, coordinates, share links, ovals, or even-diameter layouts. Keep the PNG beside the game and place the highlighted blocks manually.
Ready to place the first block? Open the pixel circle generator, enter the radius, keep it on Outline, and save the PNG. Build one quarter carefully; the other three are just mirrors.






Reader discussion
Comments
Share what worked, what did not, or what you would test next. Every comment is reviewed before it appears.
Loading approved comments…
Leave a comment
No account or sign-in is required. Links and HTML are not accepted.