Blacks Look Gray on Monitor? How to Fix Washed-Out Blacks in Minutes
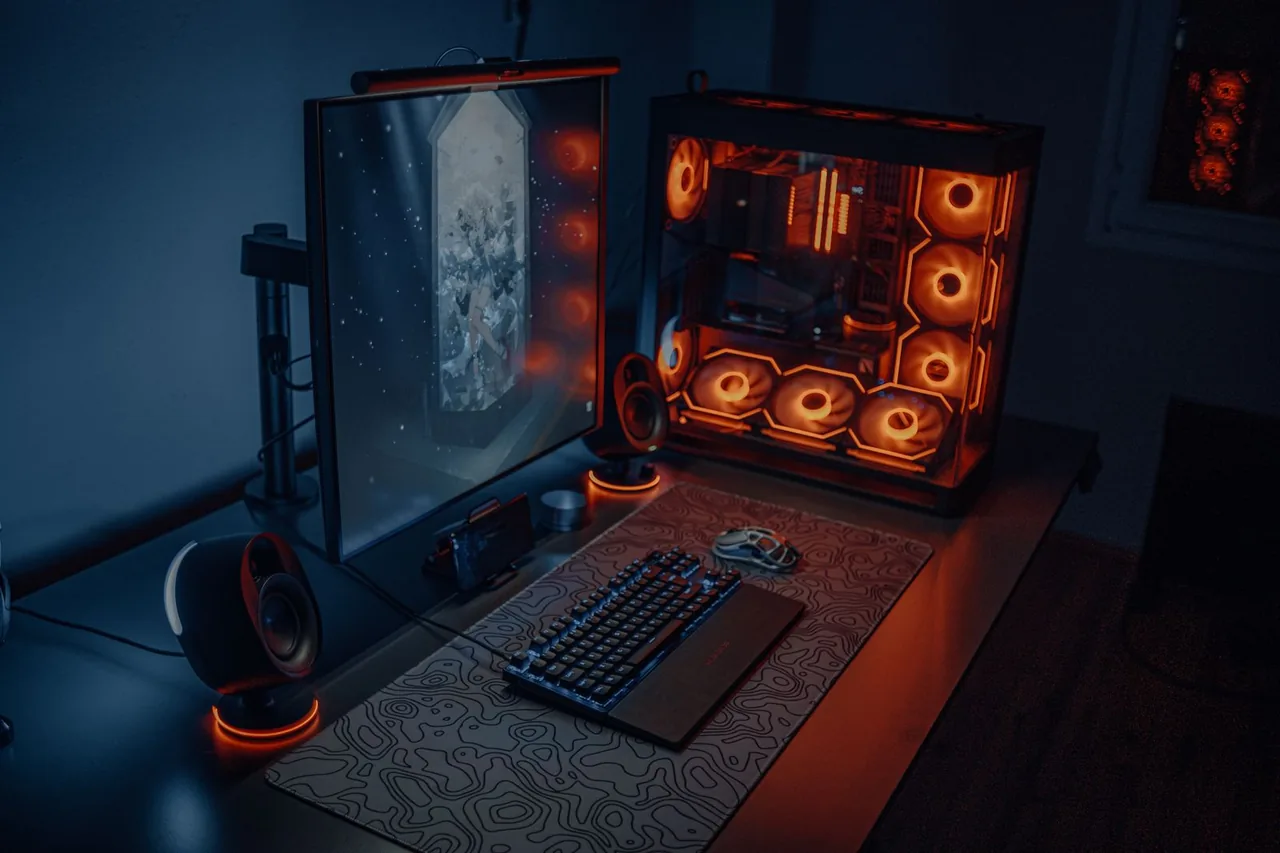
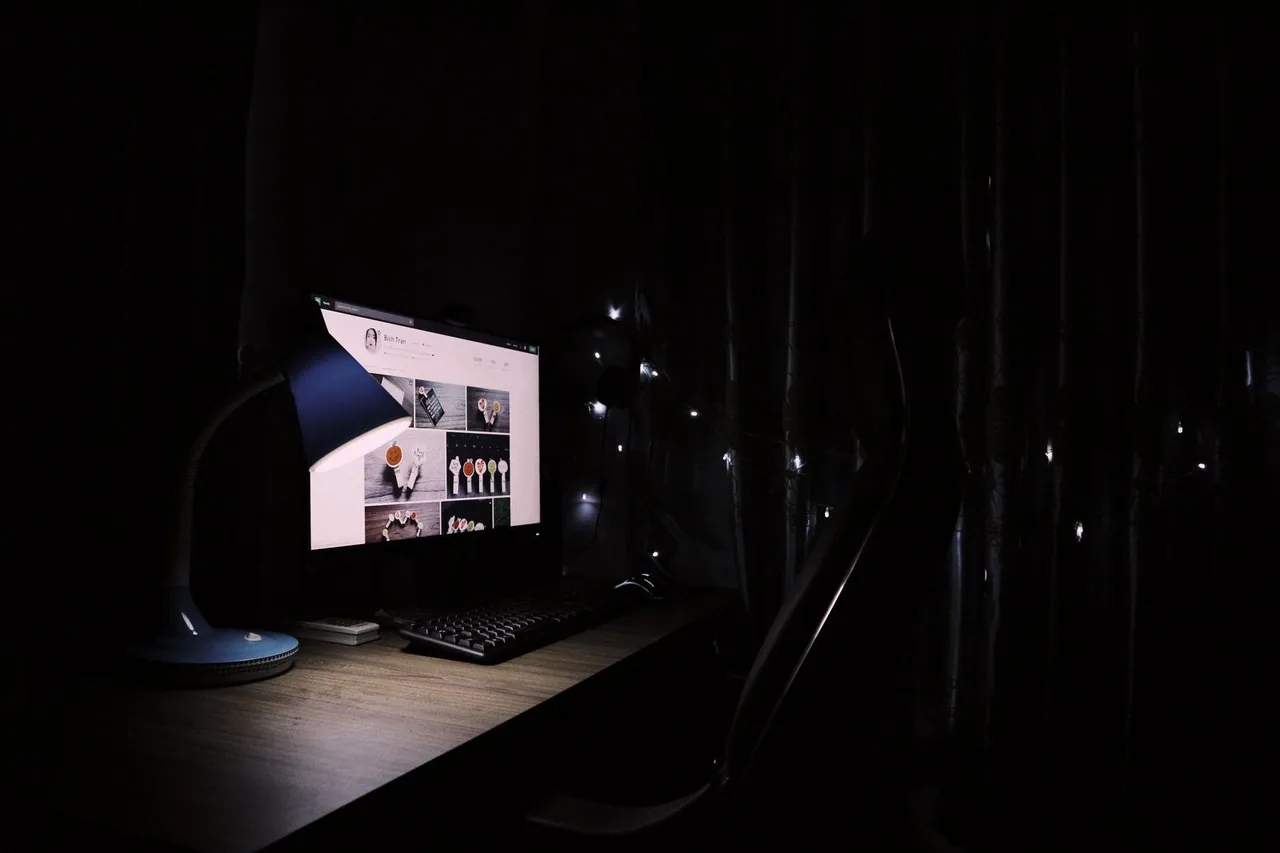
You press play on a dark movie scene and instead of black, you get a foggy dark gray. Game shadows look like someone smeared milk over the screen. Maybe it started the day you connected the monitor over HDMI, or right after a driver update, or when you plugged your PC into a TV. The complaint shows up the same way on Microsoft Q&A, Tom’s Hardware, and Reddit: blacks look gray on the monitor and every color looks washed out.
Here is the good news: this is almost never a dying panel. In the vast majority of cases your PC and your monitor simply disagree about which RGB range they are speaking — Full (0–255) versus Limited (16–235) — and one dropdown fixes it. This guide does what other pages cannot: instead of asking you to eyeball it, you will run the free Color Range Test and see in 60 seconds exactly which range your screen is rendering. Then you work through the fixes in order and re-run the test after each one until black is black again.
The fast answer: Gray blacks are almost always a Full vs Limited RGB mismatch. Your GPU is sending 16–235 while the monitor renders 0–255, so “black” arrives as RGB 16 — dark gray. Fix it in the GPU driver: NVIDIA Control Panel › Display › Change resolution › Output dynamic range › Full (AMD: Pixel Format › RGB 4:4:4 Full; Intel: Quantization Range › Full). Then make sure the monitor’s Black Level / HDMI Black Level setting matches. Prove the fix on the Color Range Test — the first near-black patch should be true black.
Why Blacks Turn Gray: 0–255 vs 16–235 in Plain Language
Every pixel on your screen is built from red, green, and blue values between 0 and 255. Full range uses all of them: 0 is the blackest black, 255 is the brightest white. That is how PCs have always worked.
Limited range (also called TV range, video range, or 16–235) comes from broadcast television. Old analog standards reserved the values below 16 and above 235 for signal headroom, so TVs learned to treat 16 as black and 235 as white. Blu-rays and broadcast video still use it, and HDMI — a standard born in the TV world — carries that legacy with it.
Both ranges look perfectly fine as long as both ends of the cable agree. The washed-out disaster happens at the handshake:
- GPU sends Limited, monitor renders Full — your problem. The darkest value the monitor ever receives is 16, which it dutifully displays as dark gray. Every black on screen floats at gray, whites top out dull, and the whole image looks low-contrast and foggy.
- GPU sends Full, monitor expects Limited — the mirror image. Everything from 0 to 15 gets crushed into one identical black and highlights clip. Shadow detail disappears; this is the classic “black crush” that the Black Level Test catches.
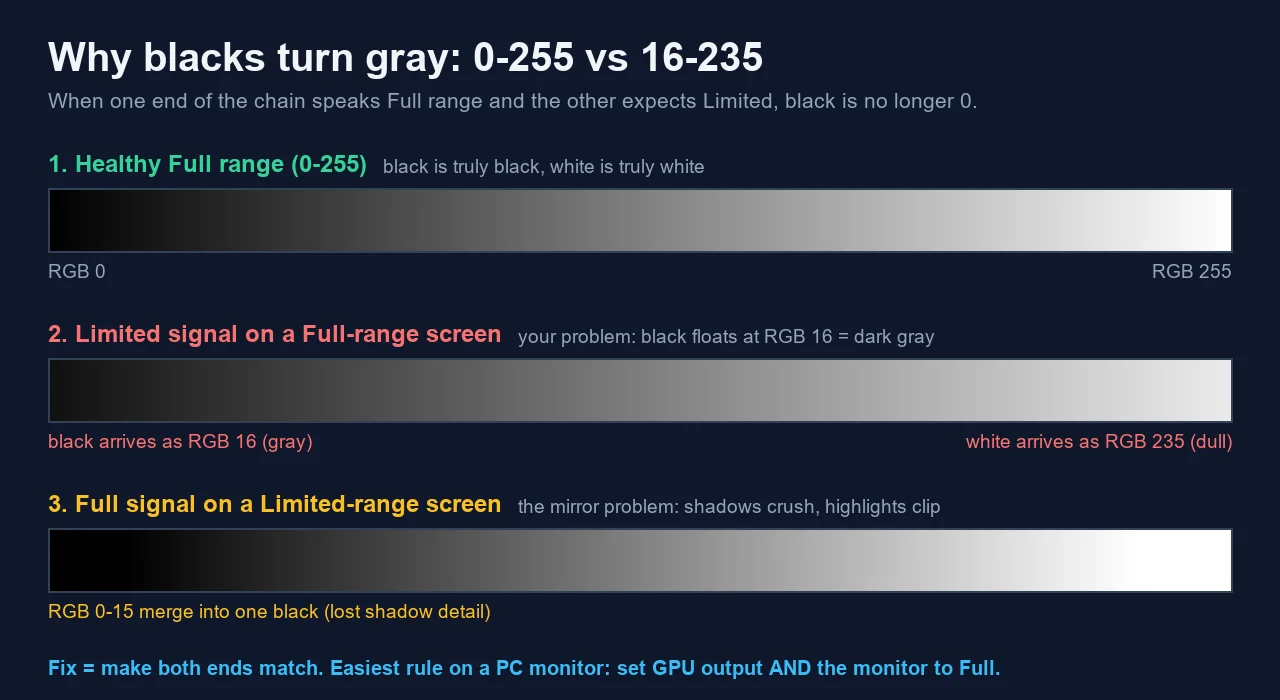
Because both failure modes come from the same mismatch, the fix is identical: make both ends speak the same range, and on a PC monitor that should be Full–to–Full. But before you change anything, prove which case you are in.
The 60-Second Proof: Run the Color Range Test
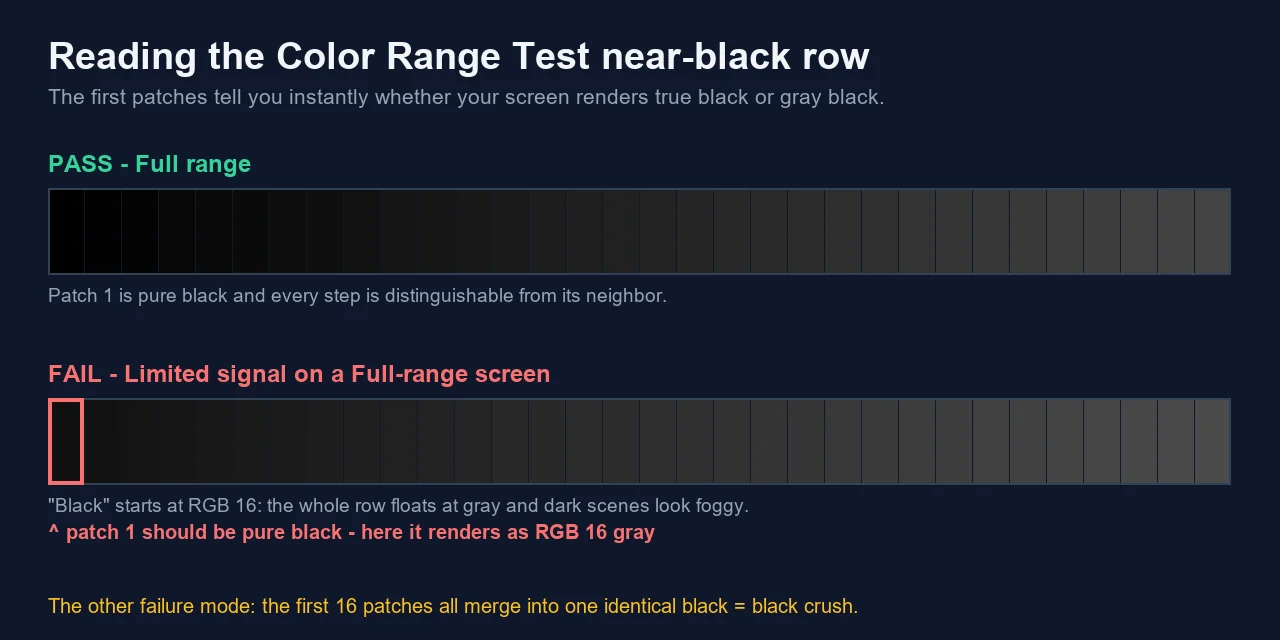
Forum threads make you stare at wallpaper screenshots and guess. You can do better: the Color Range Test displays two rows of 32 calibrated patches — the near-black range (RGB 0–31) and the near-white range (RGB 224–255) — plus a continuous 0–255 gradient ramp. It runs in any browser, nothing to install.
- Open the test and go fullscreen. Dim the room lights if you can; ambient light masks near-black differences.
- Look at the first patches of the near-black row. On a healthy Full-range chain, patch 1 is pure black and every step up is faintly but visibly lighter than its neighbor.
- Read your failure mode. If the entire row starts at an obvious dark gray instead of black, your screen is receiving a Limited signal and rendering it as Full — the gray-blacks case. If the first 16 patches all merge into one identical black, your chain is crushing — the opposite mismatch.
- Check the near-white row too. The gray-blacks case usually pairs with dull, clipped-looking highlights that never reach bright white.
Keep the test open in a tab. The workflow for the rest of this guide is simple and reproducible: change one setting, re-run the test, look at patch 1. The moment it turns true black with visible steps above it, you are done. It is the same one-variable-at-a-time discipline that works for a monitor stuck at 60Hz.
Fix 1: Set Your GPU Output to Full RGB (NVIDIA, AMD, Intel)
Start at the GPU, because this is the cause in most cases — especially the famous NVIDIA trap: over HDMI, NVIDIA drivers have historically defaulted to Limited range whenever the display identifies itself as a TV (and sometimes when it does not). The setting can also silently revert to Limited after a driver update, which explains the “it was fine yesterday” reports all over the GeForce forums.
NVIDIA
- Right-click the desktop and open the NVIDIA Control Panel.
- Go to Display › Change resolution.
- Scroll to 3. Apply the following settings and select Use NVIDIA color settings.
- Set Output dynamic range to Full (and leave Output color format on RGB).
- Click Apply. If you use the newer NVIDIA App, the same color controls live under the display settings there.
AMD
- Right-click the desktop and open AMD Software: Adrenalin Edition.
- Click the Settings gear, then the Display tab.
- Set Pixel Format to RGB 4:4:4 Pixel Format PC Standard (Full RGB) — not the “Studio” (Limited) option.
Intel
- Open Intel Graphics Command Center (or the newer Intel Graphics Software).
- Go to Display, pick the affected monitor, and open the Color settings.
- Set Quantization Range to Full.
Re-run the Color Range Test. For most readers, patch 1 just turned black and you can jump to verification. If blacks went from gray to crushed instead — the first patches now merge into one black — the GPU is fixed but the monitor itself is set to expect a Limited signal. That is the next fix.
One more driver-side gotcha: leave the output color format on RGB. Switching to YCbCr 4:2:2 to “fix” colors halves chroma resolution and makes small text fringe and blur — if you have ever used that workaround, check the damage on the Monitor Sharpness Test.
Fix 2: Match the Monitor’s Black Level Setting in the OSD
Monitors and TVs have their own range expectation, buried in the on-screen display (OSD) menu under maddeningly inconsistent names. If the GPU now sends Full but the screen still expects Limited (or the reverse), you get crushed or gray blacks even with a “correct” driver setting. The rule: the OSD option must match what the GPU sends — and since you just set the GPU to Full, pick the Full-range option.
| Brand | Setting name | Pick this for a Full-range PC signal |
|---|---|---|
| LG (monitors & TVs) | Black Level | High (Low = expects Limited) |
| Samsung | HDMI Black Level | Normal (Low = expects Limited) |
| Sony | HDMI video range / Dynamic range | Full (or Auto if it detects correctly) |
| BenQ | HDMI RGB PC Range | RGB (0~255) |
| Dell / others | Input Color Range / RGB Range | Full / PC |
Three practical notes from running this fix across different screens:
- The setting is often per-input. Fixing HDMI 1 does not fix HDMI 2. Change it on the port your PC actually uses.
- “Auto” is how you got here. Auto-detection reads the HDMI handshake — the same handshake that guessed wrong. If an explicit Full/High/Normal option exists, prefer it over Auto.
- TVs used as monitors: also set the input’s label/mode to PC if the TV has one. On many TVs that switches the expected range and enables proper 4:4:4 chroma in one move.
Re-run the range test after the change. GPU Full + OSD Full is the correct end state for a desktop PC.
Fix 3: HDMI vs DisplayPort — Why HDMI Invites This Problem
Notice the pattern in every fix above: the problem child is HDMI. That is not an accident. DisplayPort is a PC-native standard, so PC-to-monitor connections over DisplayPort negotiate Full range essentially always. HDMI grew up connecting set-top boxes to TVs, where Limited range is the norm, so the EDID handshake between a GPU and an HDMI display still defaults conservatively to Limited in many combinations — particularly when the screen reports itself as a TV.
Cable and port checklist:
- If your monitor has DisplayPort, use it. It sidesteps the range handshake problem entirely and usually carries higher refresh rates too.
- Stuck on HDMI? That is fine — HDMI carries Full range perfectly well. You just have to set it explicitly: GPU to Full (Fix 1) and the monitor’s HDMI black level to the Full option (Fix 2).
- Adapters can re-introduce the bug. USB-C-to-HDMI dongles and AV receivers in the chain renegotiate the handshake. If gray blacks appear only through the adapter or receiver, test with a direct cable to isolate it.
- Consoles have the same setting. If the same screen looks washed out on a PS5 or Xbox, set the console’s RGB Range / Black Level to match the TV input — same mismatch, different box.
After any cable or port change, the handshake renegotiates — so re-check the range test and, if you changed resolution or refresh rate in the process, confirm your Hz did not silently drop with the refresh-rate fix guide.
Fix 4: Windows HDR Is Washing Out Your SDR Desktop
If blacks and colors look fine normally but turn flat and gray the moment Windows HDR switches on, you are looking at a different mechanism with the same symptom. With HDR enabled, Windows remaps all regular (SDR) content — the desktop, browsers, most games — into the HDR signal. On monitors with modest HDR hardware, that remap lands dim and washed out.
- Open Settings › System › Display › HDR (Windows 11) or Windows HD Color settings (Windows 10).
- Find the SDR content brightness slider and raise it until the desktop looks natural. This slider only exists while HDR is on.
- Run the HDR display calibration app (Windows 11) if available — it sets the black level and clipping points properly.
- Be honest about the hardware: on a DisplayHDR 400-class monitor with no local dimming, HDR mode often looks worse than SDR everywhere except actual HDR video. Turning HDR on only for HDR games and films is a legitimate fix.
- Re-check Auto HDR (and on recent builds, Automatically manage color for apps) if individual games look washed out while the desktop looks fine.
The range test helps here too: run it once with HDR off and once with HDR on. If patches step cleanly in SDR but the floor lifts in HDR, the problem is the HDR pipeline, not your GPU range setting — adjust the SDR brightness slider instead of touching Fix 1 again.
Still Gray? Gamma, Night Light, Profiles, and Panel Limits
If the range test now passes — true black in patch 1, clean steps above it — but the picture still does not satisfy you, the remaining suspects are not range-related. Work through them with the matching test so you never guess:
| Symptom | Likely cause | Check with |
|---|---|---|
| Shadows too bright overall, but black itself is black | Gamma set too low (or a gaming “black equalizer” mode is on) | Monitor Gamma Test — aim for ~2.2 |
| Whole image slightly milky, worst at low brightness | Contrast set too low in the OSD, or an “eco/dynamic” picture mode | Contrast Test + Brightness Test |
| Warm orange-gray cast in the evening | Night light / blue-light filter or an ICC color profile applied by f.lux-style software | Toggle night light off, then re-look at the gradient ramp |
| Blacks gray only in dark rooms, glowing corners | IPS glow / backlight bleed — a panel property, not a setting | Backlight Bleed Test in a dim room |
| Blacks never get truly dark on a laptop or budget IPS/TN screen | Native panel contrast (~1000:1) — IPS black is dark gray next to a VA or OLED | Compare against the Black Level Test on another screen |
That last row deserves a plain statement, because no settings guide will say it: an IPS panel cannot produce OLED black. If your range, gamma, and contrast all test correctly and you still find blacks gray in a pitch-dark room, you have reached the physical limit of the backlight. The fix at that point is hardware (VA, mini-LED, or OLED), not software — and at least you will know you are buying for a real reason, not a misconfiguration.
Verify the Fix: A Three-Test Checklist
Settings can look right while the picture still is not. Spend two minutes proving the chain end to end:
- Color Range Test — the range itself. Patch 1 of the near-black row is true black; steps 2–32 are each faintly lighter; the near-white row reaches clean bright white; the gradient ramp is smooth with no flat gray floor.
- Black Level Test — shadow detail. All 32 near-black steps on a black background are distinguishable. If steps 1–8 vanish, brightness is too low or a crush remains somewhere in the chain.
- Contrast Test — the full span. Dark and bright detail visible simultaneously confirms you did not fix blacks by sacrificing highlights.
If you prefer to watch the core settings walkthrough before touching anything, this video covers the washed-out external monitor case step by step.
One spelling note for our UK readers searching “blacks look grey on monitor”: same problem, same fix — the RGB range does not care how you spell it.
Sources and Further Reading
- NVIDIA Control Panel Help — To change the RGB dynamic range (Full 0–255 vs Limited 16–235)
- PC Monitors — Correcting HDMI colour on NVIDIA and AMD GPUs
- Microsoft Support — HDR settings in Windows (SDR content brightness)
- Microsoft Q&A — “Screen display appears washed out”
- Tom’s Hardware — “My display has washed out blacks”
- How-To Geek (2016) — the original NVIDIA-HDMI limited-range writeup
Ready to see the truth? Open the Color Range Test, go fullscreen, and look at the first near-black patch. If it is gray, you now know exactly which dropdown to change — and the test will tell you the moment black is really black again.
Quick Action Checklist
- Clean the display first so dust is not mistaken for a pixel issue.
- Use full-screen mode where possible.
- Test several solid colors, not only black or white.
- Compare screenshots only after checking the screen directly.
FAQ: Blacks Look Gray on Monitor
Why do blacks look gray on my monitor?
In most cases the GPU is sending Limited-range RGB (16–235) while the monitor expects Full range (0–255). The darkest value the monitor receives is then RGB 16, which it renders as dark gray instead of true black, so the whole image looks foggy and washed out. It is a settings mismatch, not a failing panel. Set the GPU output to Full RGB, make sure the monitor’s black level or input range setting matches, then confirm the fix on the Color Range Test.
Should RGB range be Full or Limited?
On a PC connected to a PC monitor, both ends should be Full (0–255). Limited (16–235) exists for TV and broadcast video standards. The real rule is that both ends must match: Full-to-Full is ideal for a desktop, and Limited-to-Limited also displays correctly. The washed-out gray look only appears when one end sends Limited and the other renders it as Full — or shadow detail crushes when it is the other way around.
Does HDMI cause washed-out colors?
HDMI itself does not, but the HDMI handshake often does. HDMI was designed for TVs, so GPUs sometimes default HDMI connections to Limited range — especially when the display identifies itself as a TV. DisplayPort connections between a PC and a monitor normally run Full range automatically. If colors washed out right after you connected via HDMI, set the GPU’s output dynamic range to Full or switch to DisplayPort.
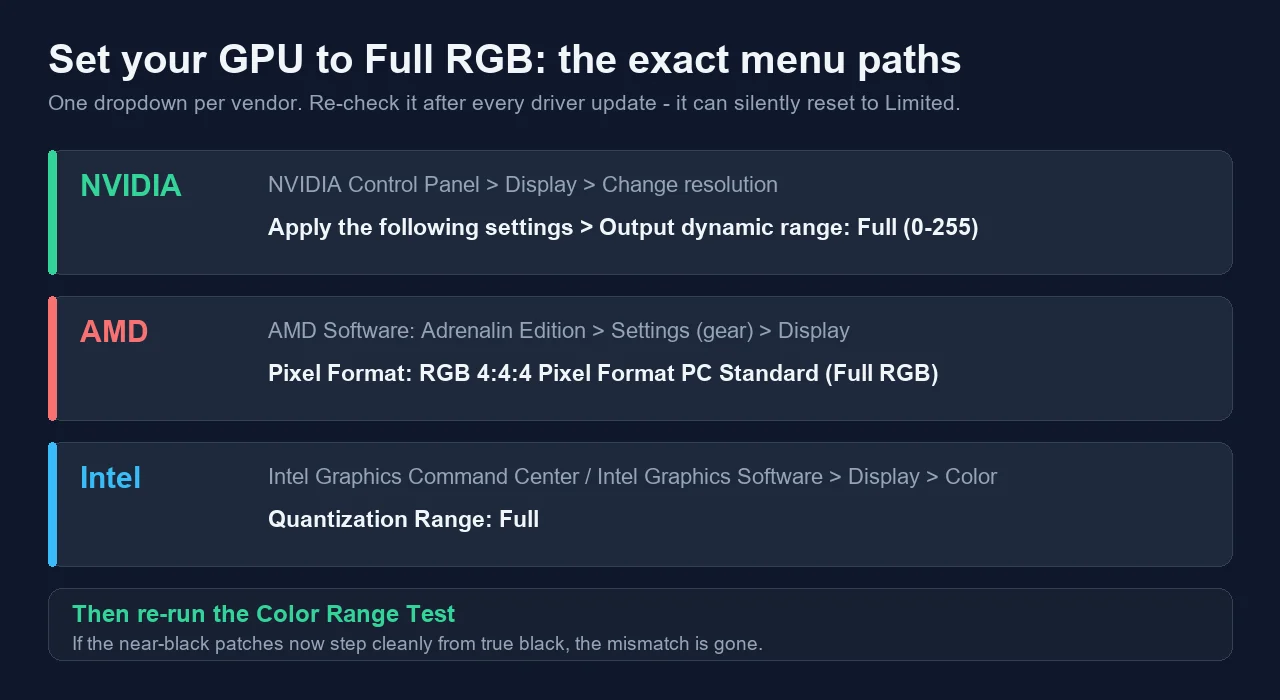
How do I fix gray blacks on NVIDIA or AMD?
NVIDIA: NVIDIA Control Panel › Display › Change resolution › Apply the following settings › Output dynamic range: Full (0–255). AMD: AMD Software Adrenalin › Settings › Display › Pixel Format: RGB 4:4:4 PC Standard (Full RGB). Intel: Graphics Command Center › Display › Color › Quantization Range: Full. Re-check after driver updates — the setting can silently reset to Limited.
Why does my screen look washed out only in HDR?
With Windows HDR on, regular SDR content like the desktop is remapped inside the HDR signal, and on monitors with weak HDR hardware the result looks flat and gray. Open Settings › System › Display › HDR and raise the SDR content brightness slider until the desktop looks right. On a DisplayHDR 400-class monitor without local dimming, leaving HDR off outside actual HDR games and video usually looks better.
Is IPS glow the same as gray blacks?
No. IPS glow and backlight bleed are panel-level effects that brighten parts of the screen — mostly corners and edges — and they change with viewing angle and brightness. A range mismatch lifts every black pixel uniformly across the whole screen. Run the Color Range Test first: if near-black steps render correctly but dark scenes still glow in the corners, it is the panel, and the Backlight Bleed Test will show you how much.