Keyboard Typing Double Letters? The Complete Key Chatter Fix Guide (2026)


Fast answer: Use this guide as a practical checklist for keyboard typing double letters? the complete key chatter fix guide. Start with the main browser tool, confirm the result with one focused follow-up test, then change only one device, browser, or setting at a time so you know what actually fixed the issue.
You type "hello" and get "hellllo." You press Enter once and a form submits twice. You tap a gaming key and your character fires two shots instead of one. Infuriating — and it seems to appear out of nowhere, then gets progressively worse.
This is key chatter (also called contact bounce or keyboard chattering), and it is one of the most misunderstood keyboard problems there is. People assume it is ghosting, a driver issue, or even malware. It is none of those. It is a hardware failure happening at the millisecond level inside your switch — and once you understand exactly what is happening, fixing it becomes straightforward. If keys are missing during multi-press instead of doubling, that's a different problem — see what is keyboard ghosting and how to fix it.
If deliberate single presses register correctly and there are no duplicate or missed events, the changing result may be human or passage-related rather than chatter. Use the separate guide to compare inconsistent typing-speed runs before replacing a switch or keyboard.
This guide covers every practical fix ranked from fastest to most involved, for every type of keyboard. Start at the top. Most people do not need to reach the bottom.
Step 1: Confirm It Is Actually Key Chatter
Before you take anything apart or install any software, confirm the double typing is coming from the keyboard and not from a stuck modifier key, a Windows Accessibility feature (Filter Keys, Sticky Keys), or a macro conflict.
Open the free Keyboard Tester at KeyboardTester.click and do this test:
- Click anywhere on the page to focus it.
- Press the key you suspect is chattering — once, slowly and deliberately.
- Watch the key press counter. If it increments by 2 for a single press, that key is chattering.
- Press every other key once. Any key showing a count of 2+ from a single press is affected.
Also run the Stuck Key Test to rule out a switch that is physically stuck closed — that presents differently (key fires continuously without being pressed) but is sometimes confused with chatter.
Before anything else: press Win + I → Accessibility → Keyboard and confirm Filter Keys and Sticky Keys are both Off. Filter Keys can cause missed keystrokes; Sticky Keys can cause unexpected repeated behavior. Disable both, then retest.
What Is Key Chatter? (The Real Technical Explanation)
Every keyswitch — mechanical, membrane, or laptop — works by bringing two electrical contacts together when you press down. In a fresh, unworn switch, those contacts touch cleanly and hold. The keyboard's microcontroller registers a single electrical signal, applies its debounce filter, and reports one keypress to the computer.
Contact bounce is what happens when those contacts are worn or contaminated. Instead of a clean single contact, the surfaces touch, spring apart, touch again — micro-bouncing for 2 to 25 milliseconds before settling. To the keyboard's microcontroller, this looks like rapid-fire on-off-on-off signals — multiple keypresses in rapid succession.
The keyboard suppresses this using debounce logic — a filter that ignores additional signals from the same key for a set number of milliseconds after the first signal. The default in most keyboard firmware (including QMK) is 5ms. Fresh switches bounce for less than 1ms — well within the filter window. Worn switches bounce for 8–25ms, which slips through the 5ms window and registers as two separate keypresses.
That is key chatter. Not ghosting. Not a stuck key. Electrical noise from worn contacts slipping past a filter that was set for fresh switches.
What Causes Switches to Wear Out
- Keypress count: Cherry MX reds are rated for 50 million keystrokes. A fast typist doing 70 WPM for 6 hours daily accumulates roughly 10–12 million keystrokes per year. Expect chatter to appear on the heaviest-used keys (E, T, A, Space, Enter) after 4–5 years.
- Contact oxidation: Every keystroke micro-abrades the contact surface. Combined with skin oils and ambient humidity, this accelerates oxidation. Oxidized contacts are rough and pitted — they bounce longer.
- Contamination: Dust, debris, and especially sugar residue from drinks increase surface resistance and cause irregular contact.
- Heat and humidity cycles: Repeated expansion and contraction slightly changes contact geometry over time.
- Low-quality switches: Budget switches use thinner gold plating on contacts. That plating wears through faster, leaving bare copper that oxidizes quickly. This is why cheap keyboards develop chatter within 12–18 months while quality boards last 5+ years.
Key chatter is progressive. A switch bouncing 8ms today will bounce 15ms in six months. This is why you often experience "it started mild and rapidly got much worse."
Fix 1 — Software Debounce: Works on Any Keyboard in 2 Minutes
This is the fastest fix and requires zero hardware work. A software debounce tool intercepts keypress events at the OS level and applies an additional filter — blocking any second press of the same key that arrives within your configured threshold.
Windows: KeyboardChatteringFix
KeyboardChatteringFix by shion-key is a free, open-source Windows utility. It runs as a system tray app with no installation required.
Search GitHub for "shion-key KeyboardChatteringFix" to find the current release. Download the .exe, place it anywhere, and run it.
- Right-click the tray icon → Settings
- Set Threshold to 30ms to start
- Type for a few minutes. Still chattering? Increase to 50ms, then 80ms
- Go to Settings → Startup to run it automatically at Windows boot
At 80ms+, typing "ll" quickly (as in "all", "will", "fall") will suppress the second L because it registers within the threshold. For general typing, 30–50ms is ideal. For gaming involving rapid same-key double-taps, stay at 30ms or lower.
Mac: Karabiner-Elements
Karabiner-Elements is a free Mac keyboard customization tool. It does not have a single "debounce" slider, but the community has published complex modification rules specifically for key chatter. After installing Karabiner-Elements, visit the Karabiner-Elements complex modifications library and search "chatter" for community-maintained rules.
Fix 2 — Firmware Debounce (QMK / VIA Keyboards)
If your keyboard runs QMK firmware — which includes most custom 60%/65%/75% builds, and production boards from Keychron, many Ducky models, and others — you can increase the debounce window directly in firmware. This is a hardware-level fix that requires no third-party software running at startup.
Via QMK source (config.h)
In your keyboard's config.h file, find or add this line and increase the value:
Recompile with qmk compile and flash with qmk flash. This is a permanent fix stored in the keyboard itself — it works on any computer, with any OS, with no software running.
Via VIAL (graphical, no coding)
Some QMK keyboards support VIAL — a live, graphical QMK configurator. Open the VIAL desktop app, go to Quantum → Debounce, and drag the slider up. Changes apply instantly without reflashing. If your keyboard supports it, this is the cleanest path.
Safe ceiling: 15ms covers virtually all chatter cases without any perceptible input lag in normal use. Beyond 15ms, very fast typists may occasionally notice a swallowed keystroke.
Fix 3 — Contact Cleaner Spray (Physical Fix, No Disassembly)
DeoxIT D5 Contact Cleaner is an electronics-grade spray that dissolves oxidation from switch contacts and leaves a thin protective film that slows re-oxidation. This is not general-purpose contact cleaner or WD-40. DeoxIT D5 specifically — available at electronics stores and Amazon for $14–18.
How to apply without opening the keyboard
- Remove the keycap from the chattering switch (standard keycap puller, $5, or a bent paperclip).
- Spray one brief, 0.3-second burst of DeoxIT D5 directly into the switch stem opening. Less is more — you want a mist, not a flood.
- Press the switch rapidly 30–40 times to work the cleaner into the contact area.
- Wait 10 minutes.
- Press 30–40 more times to expel residue.
- Replace the keycap and test.
In community testing across mechanical keyboard forums, contact cleaner resolves chatter in approximately 60–70% of cases. It works best when the root cause is contamination or light oxidation. It does not recover mechanically worn contacts where the gold plating has worn through entirely.
Chatter may stop immediately, or it may take 30–60 minutes as the cleaner works through the contacts. If chatter persists after 24 hours, the switch needs replacement — the contacts are worn past chemical recovery.
Fix 4 — Switch Replacement on Hot-Swap Keyboards
If contact cleaner does not work, the switch is physically worn beyond recovery. On a hot-swap keyboard, replacing the switch costs less than $1 and takes under 5 minutes — no tools beyond the included switch puller.
How to check if your keyboard is hot-swap
Remove a keycap and look at the switch. If you see small metal clips on the north and south sides of the switch housing, the board is hot-swap. Most modern gaming keyboards — Keychron Q/V/HE series, Wooting boards, many Monsgeek boards — are hot-swap by default.
Hot-swap switch replacement
- Remove the keycap from the chattering switch.
- Use the switch puller to clip onto the two metal tabs (north and south) of the switch housing.
- Pull straight up, firmly and evenly. The switch releases from the PCB socket.
- Take a replacement switch of your choice. Align the two metal pins with the two socket holes.
- Press down firmly until you feel a click — the pins have seated fully into the sockets.
- Replace the keycap and test.
Replacement switch cost: Gateron Yellow or Akko CS Jelly switches run $0.30–$0.50 each in packs of 35–45. Even buying a full pack to have spares costs under $20.
Fix 5 — Switch Replacement on Soldered Keyboards
For keyboards without hot-swap sockets, replacing a switch requires desoldering. This sounds more intimidating than it is — each switch has exactly two solder joints, both easy to access.
Tools needed
- Soldering iron (any 40W+ iron — a TS100 or TS80P at $25–35 is ideal)
- Desoldering pump ($8) or desoldering braid ($5)
- Replacement switch ($0.30–$0.80)
- Keycap puller and switch opener (optional but helpful)
Process
- Remove all screws from the keyboard's bottom plate. Most use Phillips head; some use Allen keys.
- Carefully separate the top and bottom housings to access the PCB.
- Locate the two round solder joints for the chattering switch on the back of the PCB.
- Heat one joint with the iron tip for 2–3 seconds until the solder is liquid. Press the desoldering pump against it and release — it pulls the solder up. Repeat until the joint is clear. Repeat for the second joint.
- The switch now slides out from the front of the PCB.
- Insert the new switch from the front, ensuring both metal pins pass through the PCB holes.
- Touch iron to the pin and pad simultaneously for 2 seconds. Feed in a tiny amount of solder (~1mm). Remove the iron and hold still for 3 seconds to cool. Repeat for the second pin.
- Reassemble, replace keycap, and test.
If you have never soldered, watch one 5-minute YouTube tutorial on through-hole soldering first. Keyboard switches are among the most forgiving components to solder — two joints, large pads, low heat required.
Fix 6 — Gaming Keyboards with Manufacturer Software
Several major gaming keyboard brands include a software debounce setting under the label "Key Response," "Response Speed," or "Anti-Ghosting Speed." These work identically to the third-party software debounce tools — they add a filter window in the driver layer.
| Brand | Software | Setting Path |
|---|---|---|
| Razer | Razer Synapse 3 | Keyboard → Performance → Key Response |
| Corsair | iCUE | Keyboard → Performance → Key Response Speed |
| Logitech | G HUB | Keyboard → Key Settings → Response Rate |
| SteelSeries | SteelSeries GG | Keyboard → Illumination → Anti-Ghosting |
| HyperX | NGENUITY | Keyboard → Performance → Key Response |
Set the response speed / key response to its highest (slowest) value and test. If chatter stops, work backwards by one step at a time until you find the minimum setting that eliminates it.
Your keyboard's polling rate (125Hz / 500Hz / 1000Hz / 8000Hz) controls how often it reports state to the computer — not how it filters bounce. Changing polling rate will not fix key chatter. Only the key response / debounce setting matters here. If repeated characters happen only while you hold a key down, check the key repeat rate and repeat delay guide instead.
Fix 7 — Membrane and Office Keyboards
Membrane keyboards fail differently from mechanical ones. Instead of a metal contact oxidizing, the conductive rubber dome deteriorates, or contamination builds up on the membrane layers, creating inconsistent electrical contact.
Is it worth cleaning a membrane keyboard?
Run this quick calculation: if the keyboard cost over $40 and you like how it types, cleaning is worth 30–45 minutes. Below $30, a replacement costs less than the time.
Membrane keyboard cleaning process
- Unscrew all screws from the bottom plate and separate the two keyboard halves.
- Carefully peel out the top membrane layer — it lifts out cleanly in most keyboards.
- Inspect both the membrane and the carbon contacts on the PCB for contamination.
- Clean contact areas with a cotton swab moistened with 90%+ isopropyl alcohol. Do not use 70% — the higher water content can leave residue.
- Let dry completely — minimum 30 minutes before reassembly.
- Reassemble carefully. The membrane layers must align precisely with the PCB guides, or keys will misfire.
If chatter persists after cleaning, the rubber dome itself is deformed — it no longer springs back fully, which means it contacts the membrane inconsistently. At that point, the keyboard needs replacement.
Fix 8 — Laptop Keyboards
Laptop keyboards use a scissor-switch mechanism over a membrane — more fragile, harder to access, and generally not worth attempting deep cleaning unless you are comfortable with disassembly. The most common causes of laptop key chatter are debris wedging the scissor mechanism and liquid residue on the membrane.
Start with compressed air
Hold the laptop at a 75-degree angle (nearly vertical, not flat) and use short bursts of compressed air between each row of keys, moving systematically from left to right. The angle uses gravity to pull dislodged debris out rather than deeper under the keys. This resolves a significant portion of laptop key chatter caused by debris.
Keycap removal (check your model first)
Most laptop keycaps can be removed by sliding a thin spudger or guitar pick under one corner and lifting gently. Before attempting this, search "[your laptop model] keycap removal" on YouTube. MacBook keys in particular use different mounting mechanisms by generation — forcing them off the wrong way snaps the scissor mechanism irreparably.
Once the keycap is off, use compressed air and a dry cotton swab to clean the exposed scissor mechanism and membrane contact point. Do not use liquids on laptop keyboards without full disassembly.
When to stop and replace the part
If chatter affects three or more keys, or if the issue started after a liquid spill, the membrane layer is compromised. Laptop keyboard replacements (the full keyboard unit) run $20–80 depending on model — typically a 30–45 minute swap that any repair shop can do, or you can do yourself with the iFixit guide for your specific model.
Repair vs Replace: The Decision Table
| Keyboard Type | Cost to Fix | Difficulty | Verdict |
|---|---|---|---|
| QMK/VIA keyboard (firmware debounce) | Free | Easy | ✅ Fix it |
| Any keyboard (software debounce) | Free | Very easy | ✅ Fix it |
| Hot-swap mechanical | <$1 per switch | Very easy | ✅ Fix it |
| Soldered mechanical, quality board ($60+) | $15–25 (tools + switch) | Medium | ✅ Fix it |
| Soldered mechanical, budget board (<$30) | $15–25 | Medium | 🔄 Replace the board |
| Gaming keyboard with software debounce | Free | Easy | ✅ Fix it |
| Premium membrane (>$40) | $5–10 | Medium | ⚠️ Try cleaning first |
| Budget membrane (<$30) | $5–10 | Medium | 🔄 Replace the keyboard |
| Laptop keyboard (debris) | Free | Easy–Medium | ✅ Clean it |
| Laptop keyboard (spill damage) | $20–80 (part) | Medium | 🔄 Replace the part |
The Long-Term Solution: Hall Effect Keyboards Cannot Chatter
If you are on your third chattering keyboard or just want to never deal with this problem again: hall effect keyboards are physically incapable of developing key chatter.
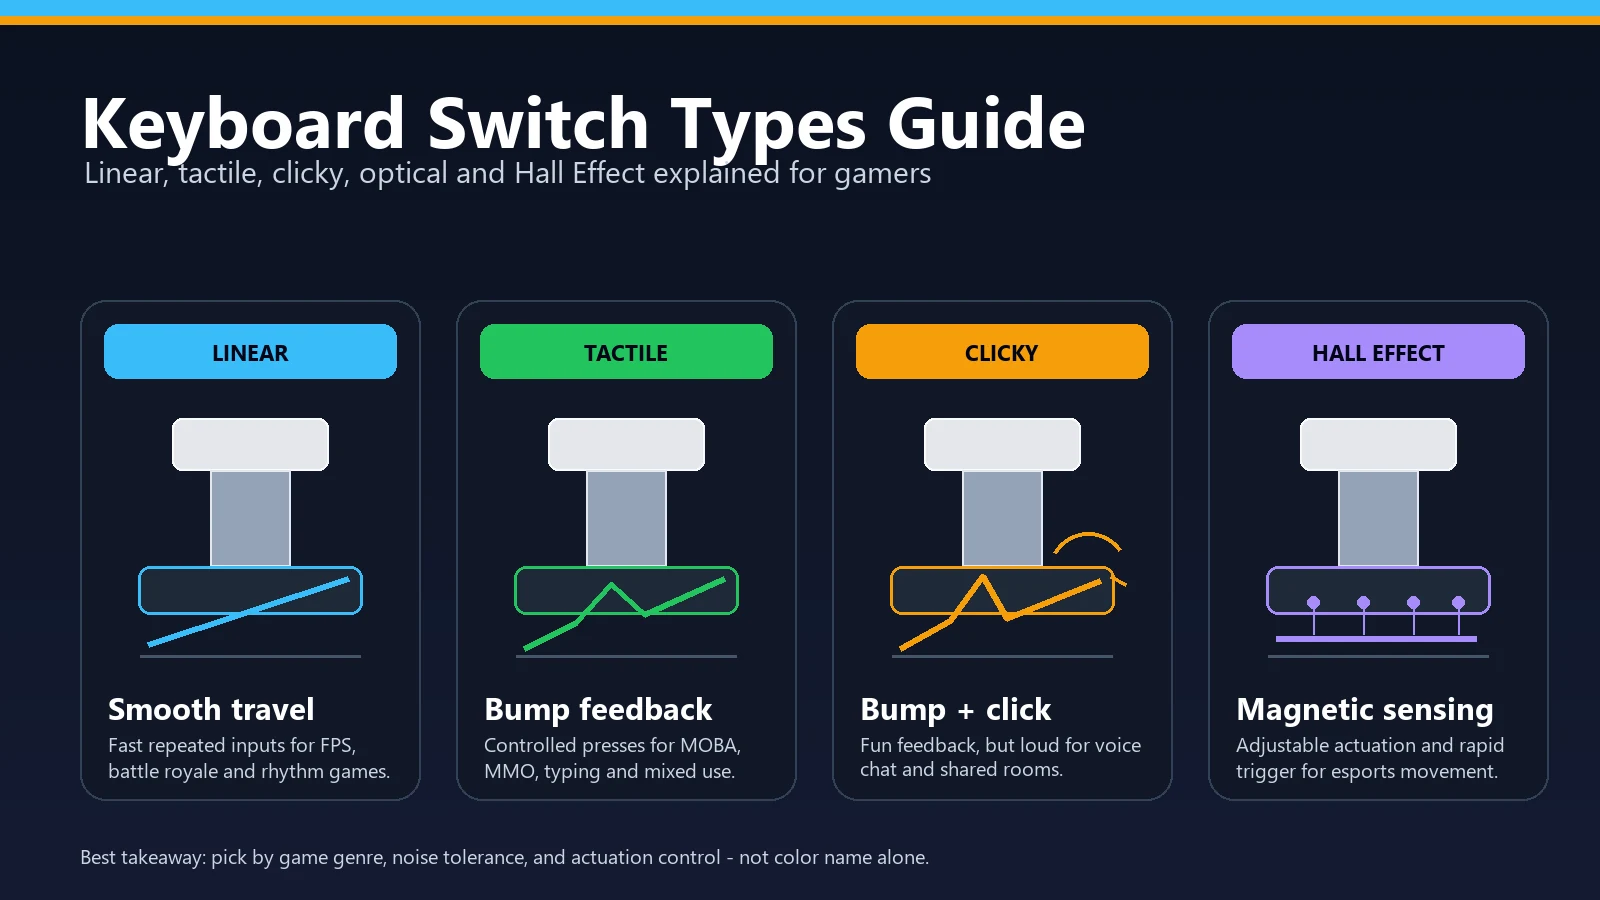
Hall effect switches use a magnet and a magnetic field sensor — there are no electrical contacts to oxidize or wear. Boards like the Wooting 60HE / 80HE and Keychron Q1 HE / Q3 Max HE use this technology. They cost $100–180, which is more than most keyboards, but the switch mechanism will outlast the rest of the keyboard by a decade.
For gamers in particular, hall effect boards offer an additional benefit: analog actuation point adjustment (Rapid Trigger), which is unrelated to chatter but represents the current competitive standard for reaction-time optimization.
If you use those features for gaming, start with conservative Hall Effect Rapid Trigger tuning rather than copying a 0.1 mm profile.
How to Prevent Key Chatter
Prevention is meaningfully possible, especially on mechanical keyboards:
- Wash your hands before extended typing sessions. Skin oils are the primary accelerant of contact oxidation. This sounds minor but makes a measurable difference across years of use.
- Keep food and drinks away from the keyboard. Sugar residue is particularly corrosive to metal contacts.
- Store the keyboard with a cover when not in use — especially in dusty environments.
- Apply contact cleaner proactively every 2–3 years on your most-used keys, before chatter develops. Prevention is more effective than cure.
- Choose quality switches. Switches with thicker gold plating (Cherry MX, Gateron Yellow Pro) or lubed factory switches resist oxidation significantly longer than bare-contact budget alternatives.
- For hall effect keyboards: There is no meaningful maintenance needed for the switch mechanism itself.
Frequently Asked Questions
Can key chatter damage my computer?
No. Key chatter generates additional keypress events at the software level, which is annoying and disruptive to workflow, but causes zero hardware damage to your computer.
My keyboard types double letters only on specific keys — why not all of them?
Key chatter is almost always isolated to the highest-use keys first. For most people, that is E, T, A, O, Space, Enter, and Backspace — the keys pressed most frequently during normal typing and gaming. These switches accumulate the most wear and are the first to develop chatter. The Space key is so common it has its own walkthrough: see spacebar not working or double-spacing for a spacebar-specific test and fix.
Does key chatter happen on brand-new keyboards?
Rarely, but yes. Manufacturing defects, contamination during assembly, or genuinely substandard switches can cause chatter on new keyboards. If a new keyboard chatters within the first 30 days, return it — this is a valid defect claim.
Will the software fix work if I switch computers?
The KeyboardChatteringFix software runs on your specific Windows installation. If you bring the keyboard to another computer, you would need to run the tool there too, or use a firmware fix (QMK) that lives inside the keyboard itself and works anywhere.
Can I fix key chatter on a keyboard connected to a PlayStation or Xbox?
Software tools only work on Windows and Mac. For console use, a QMK firmware debounce adjustment (if applicable) is the only fix that works at the keyboard level. Contact cleaner or switch replacement also works regardless of what device the keyboard is connected to.
How do I test if my fix worked properly?
Return to the Keyboard Tester at KeyboardTester.click and press each previously chattering key once, slowly. The count should now read exactly 1 per press. If it still reads 2, increase the debounce threshold (software or firmware) by 5ms and retest.
Why is my keyboard typing double letters?
Your keyboard is typing double letters because of key chatter — a condition where worn or contaminated switch contacts create rapid electrical bounce, causing the keyboard's microcontroller to register two keypress events instead of one. It gets worse over time as contacts oxidize further.
How do I fix keyboard key chatter without replacing the keyboard?
The fastest fix is a free software tool called KeyboardChatteringFix (Windows) which adds a software debounce filter. For QMK keyboards, increasing the DEBOUNCE value in firmware from 5ms to 10ms fixes most cases. DeoxIT D5 contact cleaner sprayed into the switch resolves contamination-based chatter in about 60-70% of cases.
Test Your Keyboard for Free Right Now
The fastest way to identify which keys are chattering and confirm your fix worked is the free Keyboard Tester at KeyboardTester.click. Press each key once and look for any showing a count above 1. No download, no account, works in any browser in seconds.
For related issues — if your mouse is double-clicking when it should single-click, that is the same contact bounce problem applied to mouse switches. Try the Double Click Test to diagnose it, and the same software debounce approach applies.
For other keyboard problems — ghosting, stuck keys, latency — the full suite of free keyboard testing tools covers every angle, in-browser, no install needed. And if keystrokes feel delayed or sticky rather than doubled, see our guide on how to fix keyboard lag and delay; for held-key repeat speed specifically, use the key repeat rate guide. Once the chatter is gone, the Keyboard Shortcut Identifier is a fun way to stress-test modifier keys (Ctrl, Shift, Alt) in combos and make sure they all still register cleanly.
Quick Action Checklist
- Test once in a clean browser tab.
- Retest after changing ports, wireless mode, or device settings.
- Use the focused tool that matches the symptom, not only the general tester.
- Keep screenshots or notes when comparing hardware.
Helpful Video
This related video supports the checks and decisions covered in this guide.